 Create and deploy JSR168/JSR286 with Eclipse Wizard
This quick guide to successfully deploying a Portlet has following steps :
install Eclipse
install Eclipse Portal Pack plugin
install Sun GlassFish Web Space Server
configure portlet container on GlassFish
configure Eclipse to use the OpenPortal Portlet Container (Webspace)
use Eclipse wizard to create Portlet Hello World project
use Eclipse wizard to deploy Portlet on the OpenPortal Portlet Container
verify Portlet runing on server
This guide is using a very scaled down example, where it makes no difference
whether going for Portlet 1.0 (JSR168) or 2.0 (JSR286) specifications. The Portlet container used supports both specifications.
Installing Eclipse with Eclipse Portal Pack plugin
Get Eclipse and select the Eclipse IDE for Java EE Developers, since this edition includes features for creating Web applications.
In this case have been specificly used eclipse-jee-galileo-SR1-win32.zip
Get Eclipse Portal Pack plugin .
In this case have been specificly used portlet-container-configurator.jar. Plugin pack installation is done by unpacking the zip contents into the appropriate ./plugins directory.
Installing Sun GlassFish Web Space Server 10 with Portlet container
Download
Sun GlassFish Web Space Server.
In this case has been used
webspace-10-fcs-gfv2-windows.zip
and the procedure has been:
- unpack webspace-10-fcs-gfv2-windows.zip into <gf-install-dir>=c:\eclipse-webspace
- if (sufficiently new) ant intallation is not already available in the path setting... then update path environment variable to include PATH=%PATH%;c:\eclipse-webspace\ant. You will need the ant installation in the subsequent setup of the server.
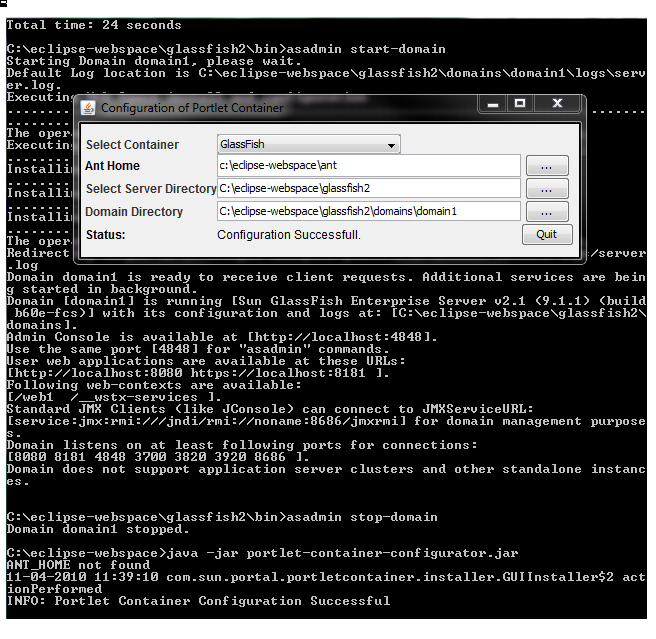
- setup Sun GlassFish Web Space Server with additional commands
cd <gf-install-dir>
ant -f setup.xml
cd ./bin
.\asadmin start-domain
.\asadmin stop-domain
The ant -f setup.xml should result in "BUILD SUCCESSFUL" as visible at the top of the subsequent screenshot.
The subsequent start and stop of the server should result in returned statements Domain listens... and Domain ... stopped, which can be seen visible at the lower part of the subsequent screenshot.
Download portlet configurator.
In this specific case have been used portlet-container-configurator.jar.
Install with command : java -jar portlet-container-configurator.jar . This will
result in a pop-up dialog, where is required to enter the absolute paths for the server installation. This is displayed in the middle of the subsequent screenshot.
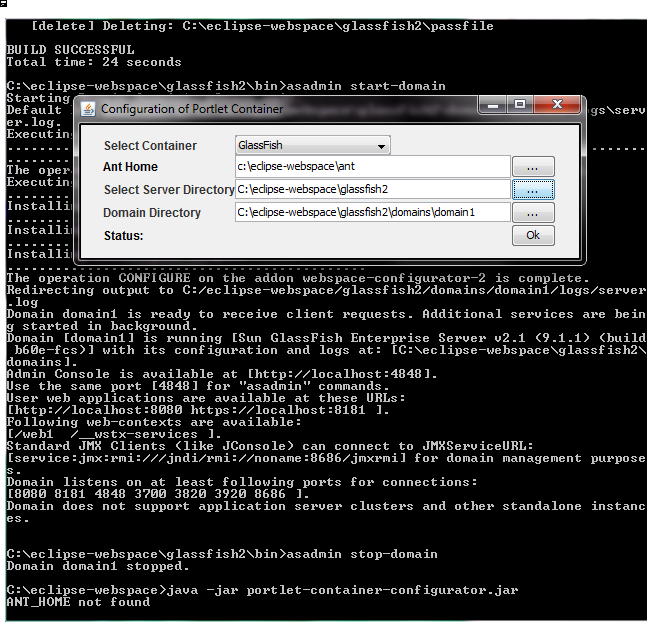
Proceed to:
- enter ant home directory
- enter ant server directory
- enter ant domain directory
- press the ok button
Inside the Glassfish installation you should now have (not available before) :
<gf-install-dir>\glassfish2\domains\domain1\lib\ccpp.jar
<gf-install-dir>\glassfish2\domains\domain1\lib\commons-fileupload.jar
<gf-install-dir>\glassfish2\domains\domain1\lib\commons-io.jar
<gf-install-dir>\glassfish2\domains\domain1\lib\container.jar
<gf-install-dir>\glassfish2\domains\domain1\lib\portlet-container-context.jar
<gf-install-dir>\glassfish2\domains\domain1\lib\portlet-container-installer.jar
<gf-install-dir>\glassfish2\domains\domain1\lib\portlet-container.jar
<gf-install-dir>\glassfish2\domains\domain1\lib\portlet.jar
<gf-install-dir>\glassfish2\domains\domain1\lib\portletadmin.jar
The trace after intallation of Portlet container (configurator).
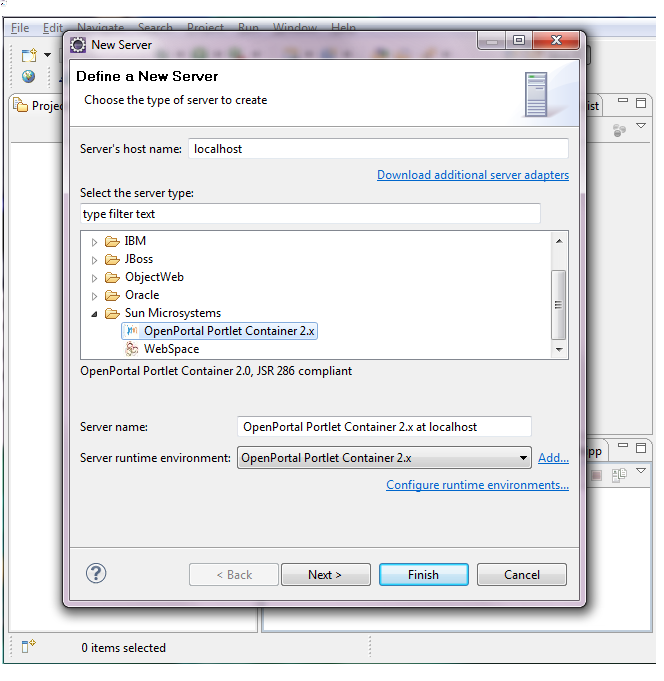
Configuring Eclipse to use Sun GlassFish Web Space Server
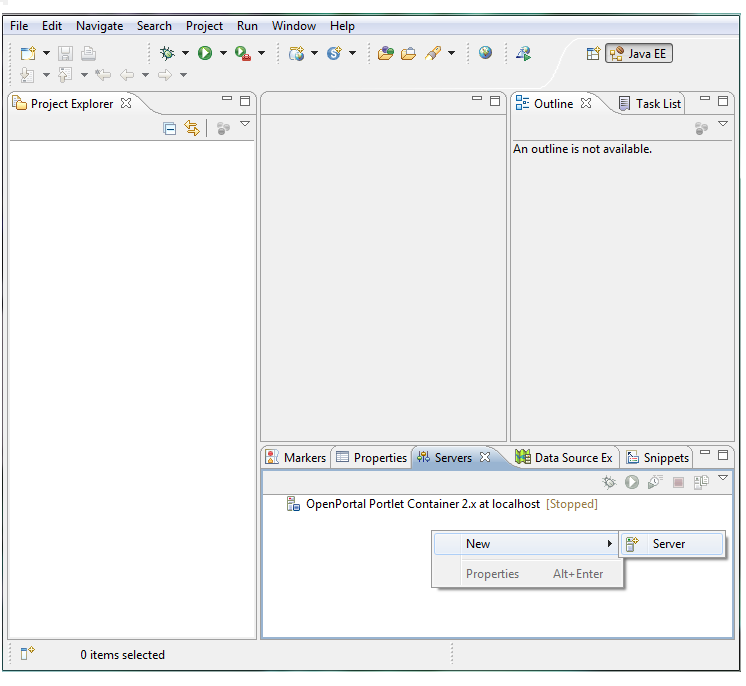
Proceed to start Eclipse (selcting workspace to work in) and add server in the Server part of the lower Eclipse view.
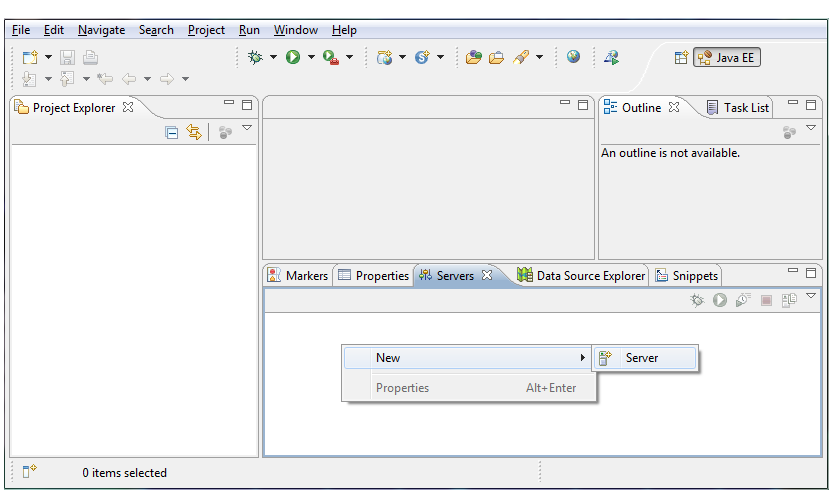
Proceed to specify type of server as Sun Microsystems OpenPortal Portlet Container 2.x.
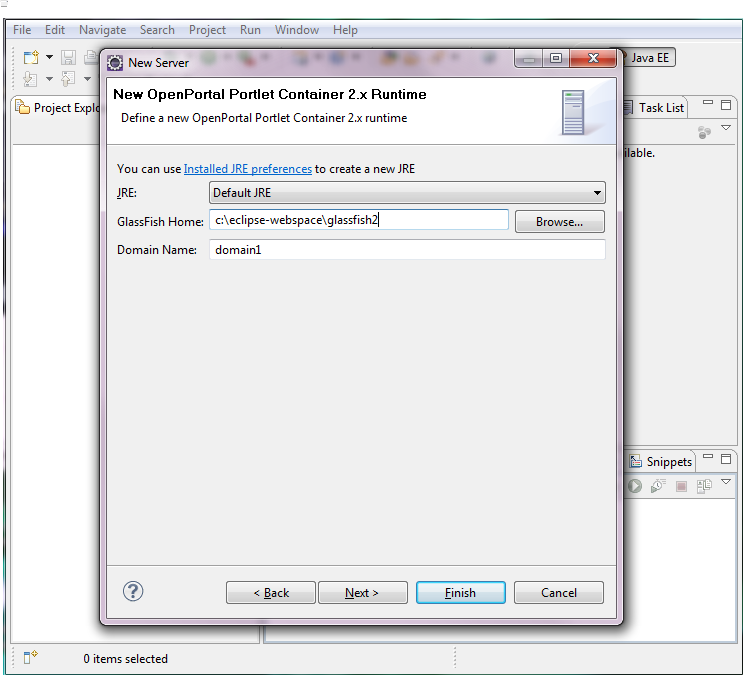
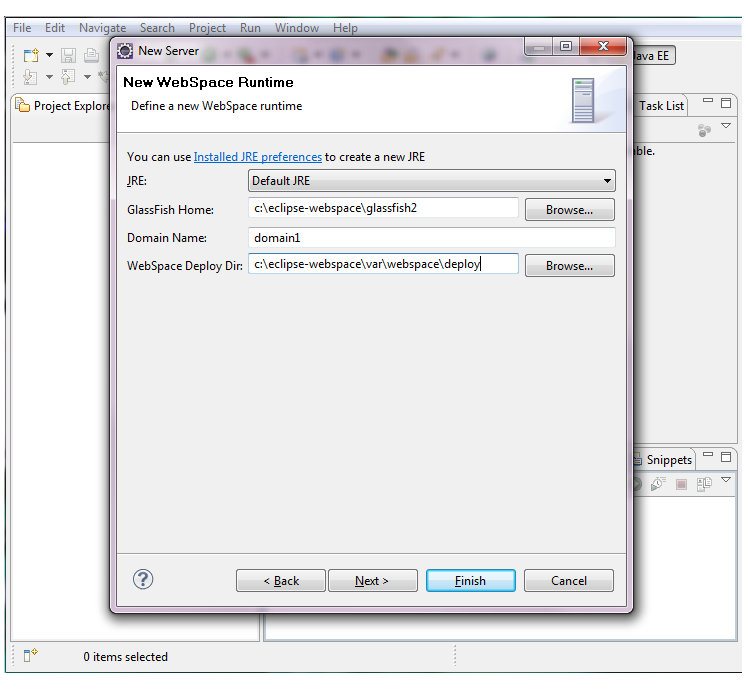
Proceed to specify JRE (default will usually do) and Glassfish location
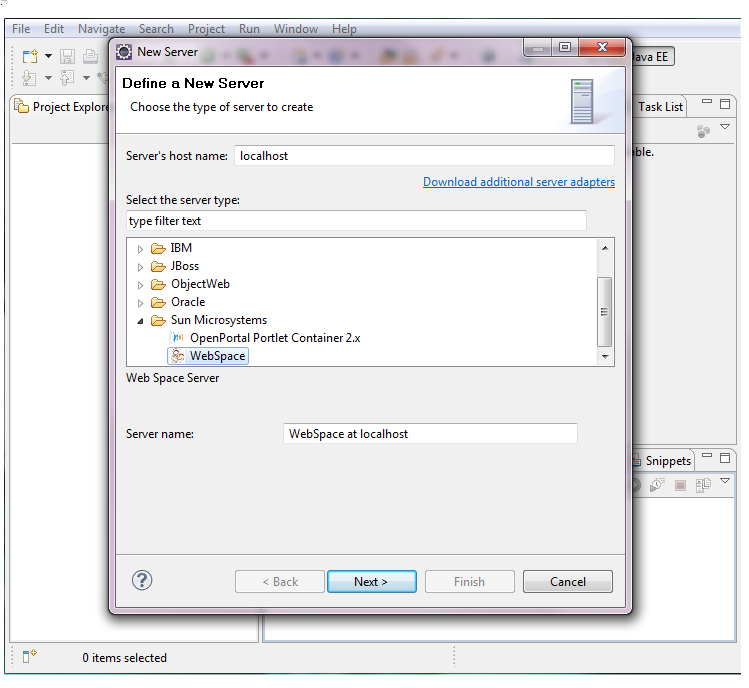
Proceed with same procedure for the webspace server
Use Eclipse Wizard to create a Portlet project
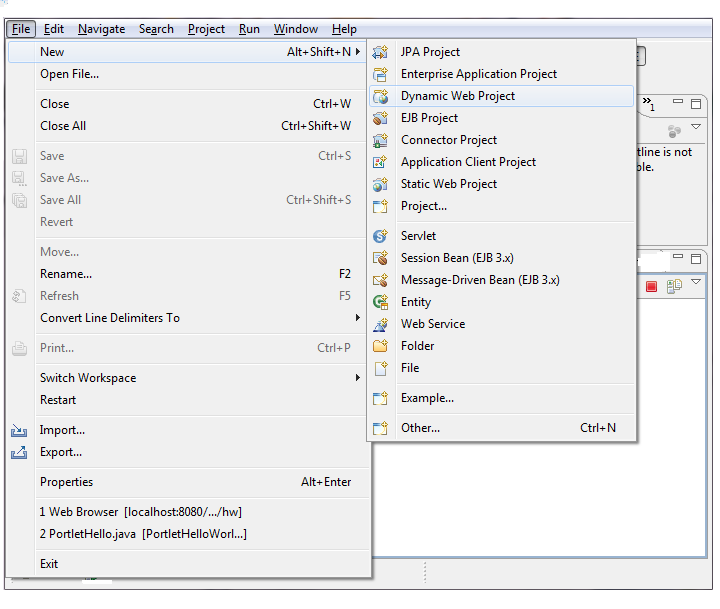
Proceed to create project from the top menu using : File -> New -> Dynamic Web Project .
The project will be named "PortletHelloWorld".
Specify the container used (OpenPortal) and the configuraition (Portlet 1.0 / 2.0 standard).
For this scaled-down example it makes no difference if selecting Portlet 1.0 (JSR168) or 2.0 (JSR286).
The other parts of this setup remain exactly the same.

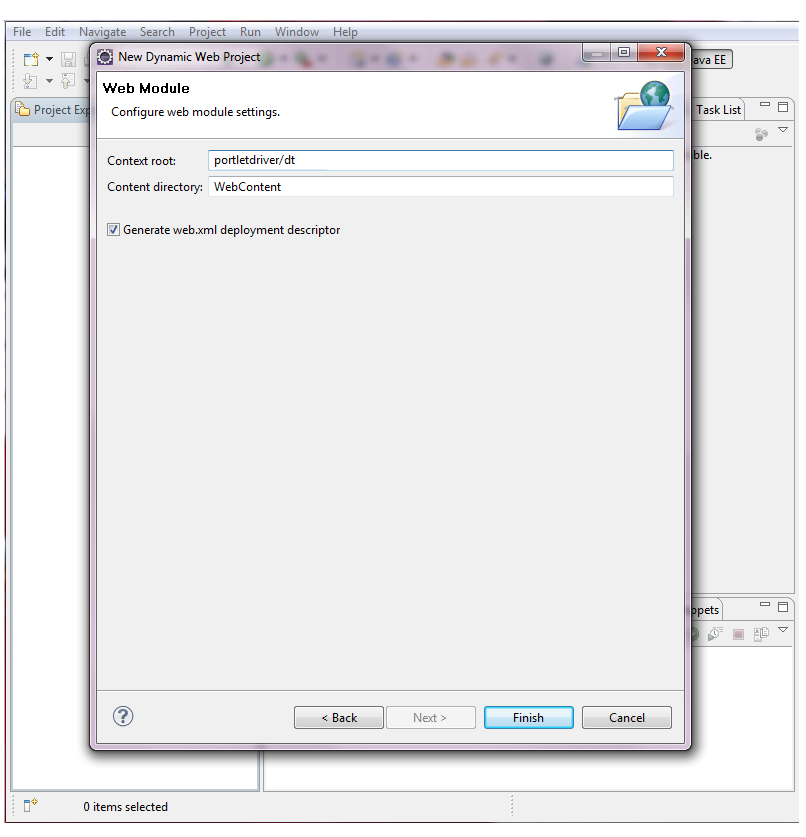
The context root is normally the extension name to the hostname in the url used to specify a web application.
In this case it is the default address used by Eclipse to display the deployed project. Since
this is a Portlet and not a normal standard web application (servlet, jsp, ..) it might be better to
ask Eclipse to open the project up with the Portlet overview container view.
The project should have been successfully cerated at this point and fully expanded
look like the screenshot as below.

Use Eclipse Wizard to create a Portlet
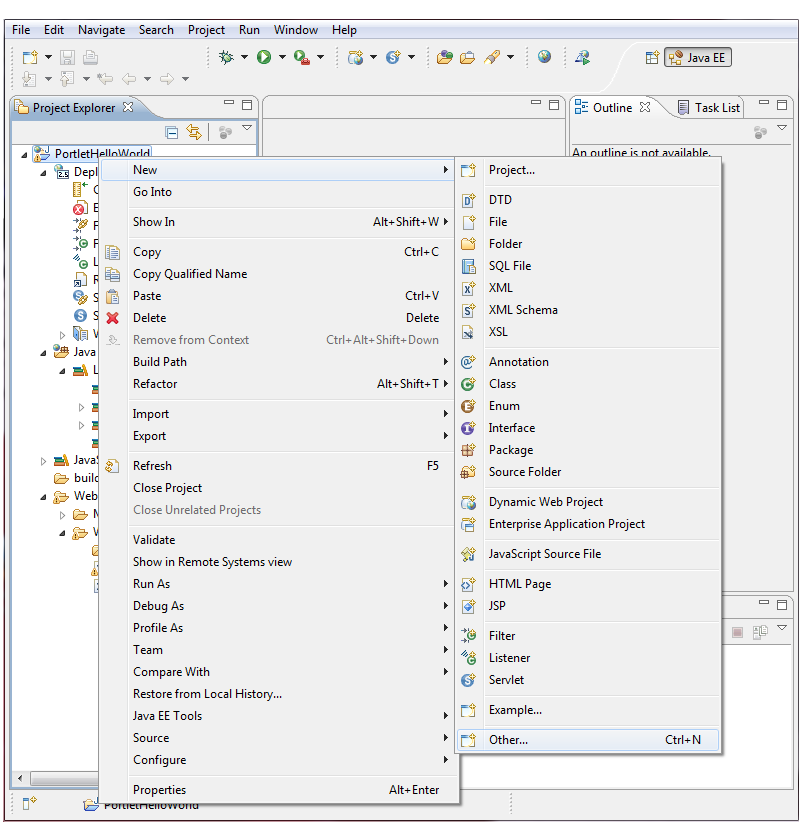
With selection fokus on the project, proceed to right-click on the project and create the Portlet using the wizard New -> Other.

The Portlet will be named "PortletHello".
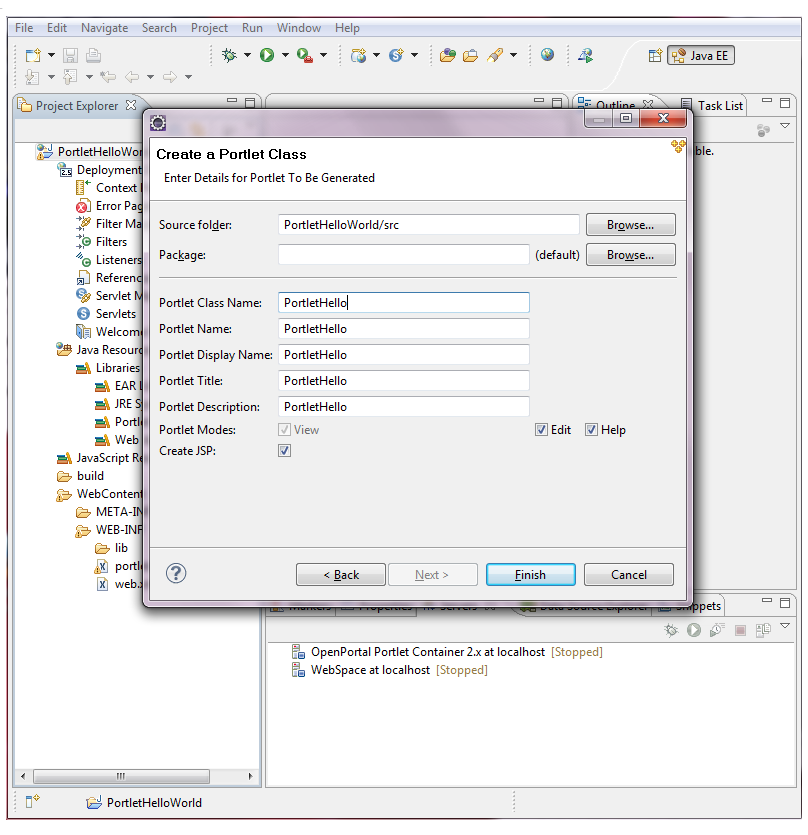
Add a print statement inside the Portlet to return a visible result.
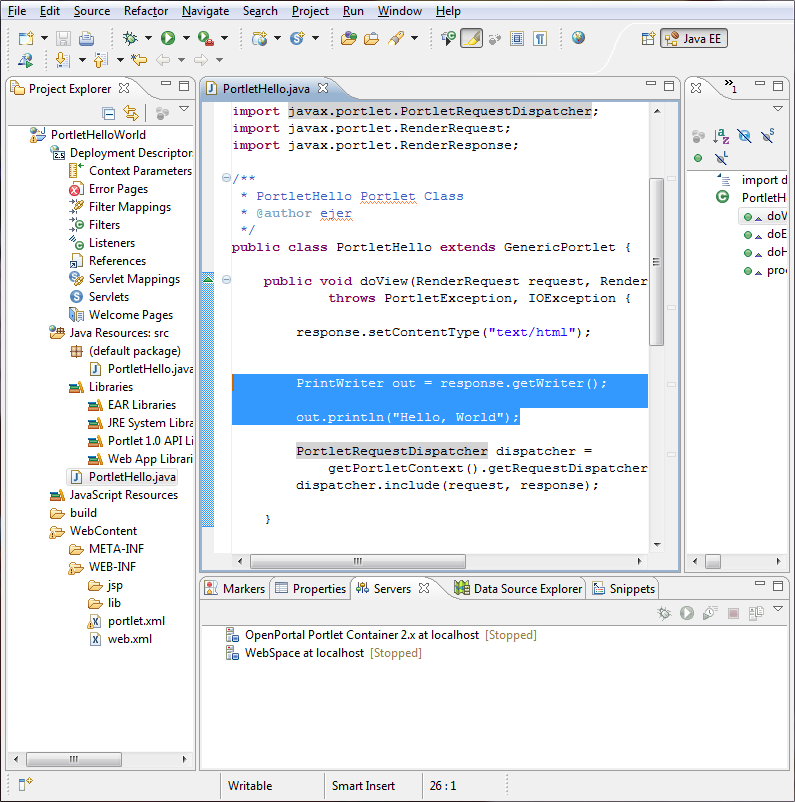
(ok... an out.close() might have been required, but this is
a scaled down example).
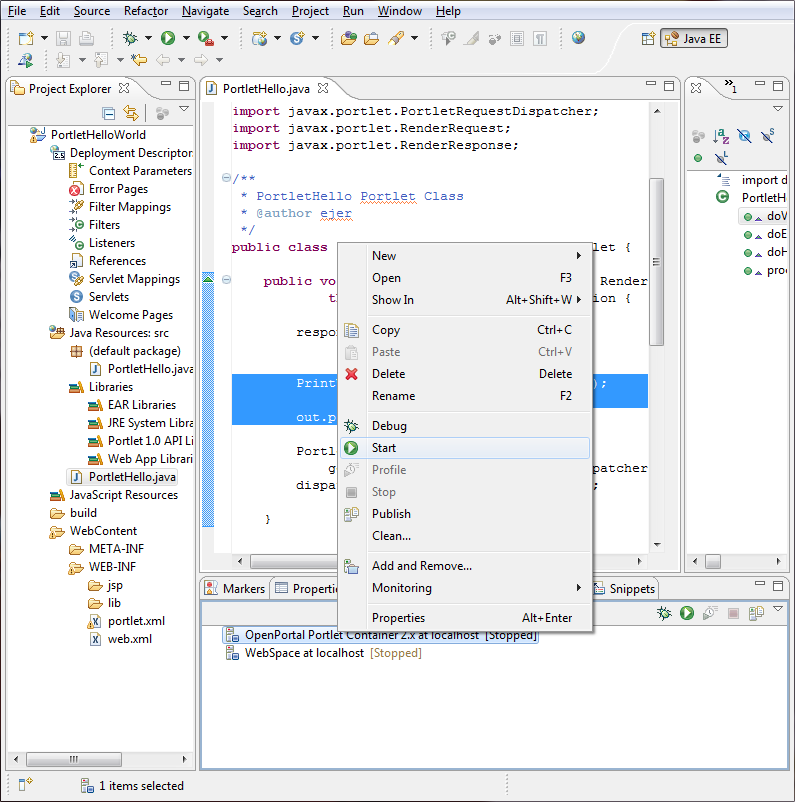
Eclipse wizard deployment of Portlet
Before deploying, it is necessary to have a running server. To accomplish
this, proceed to rigth-click on the "OpenPortal Portlet Container 2.x at
localhost" in the bottom view of the Eclipse window. Select "Start"
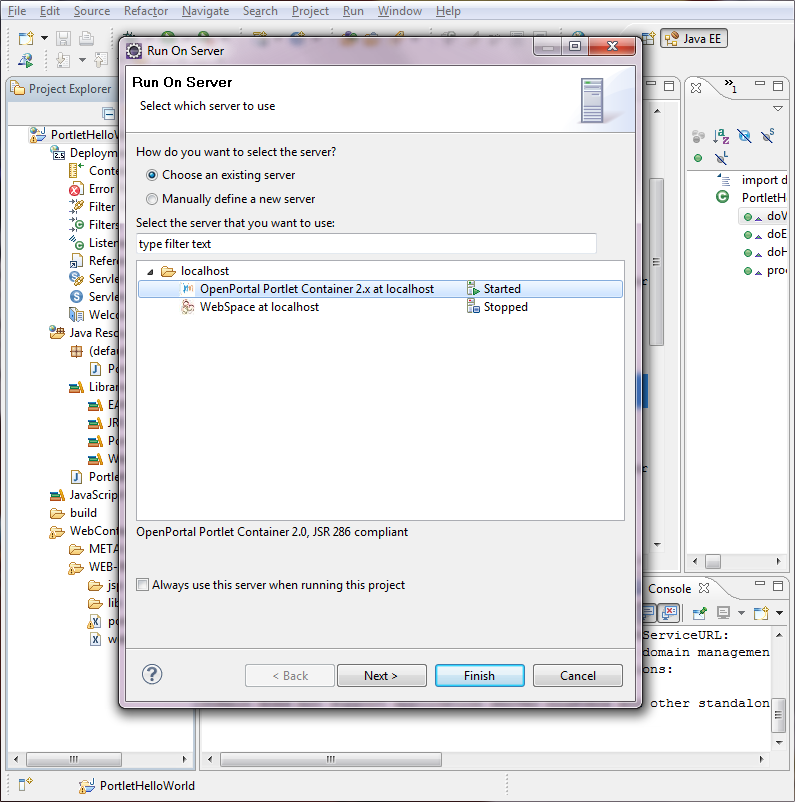
To deploy and run the portlet, proceed to right-click on the project
and select Run as -> Run on server
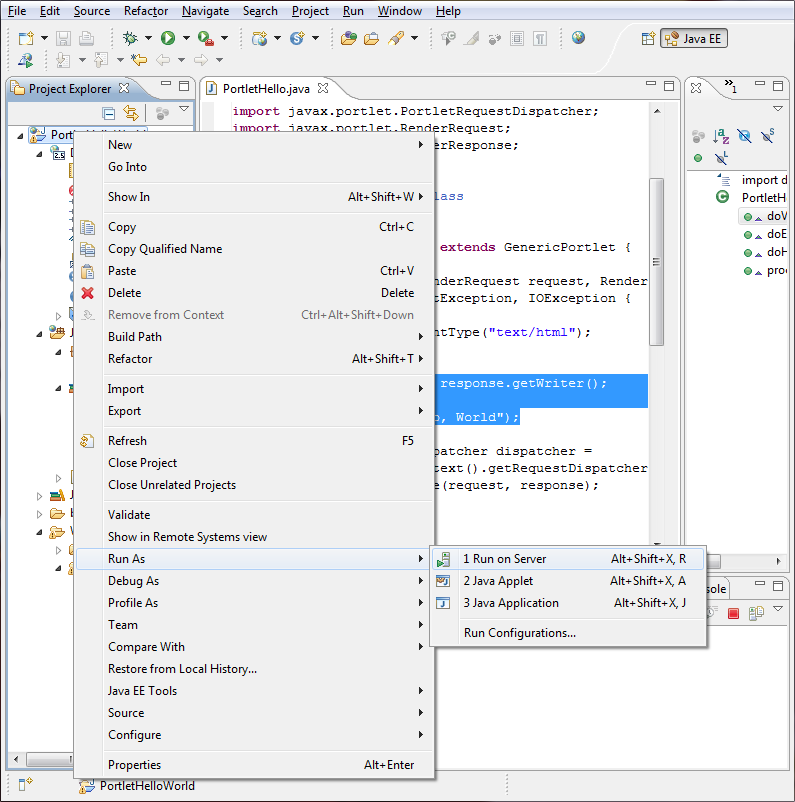
Proceed to select the "OpenPortal Portlet Container 2.x at
localhost" as deployment target. Subsequently press "Finish".
Please observe the console output "BUILD SUCCESSFUL".
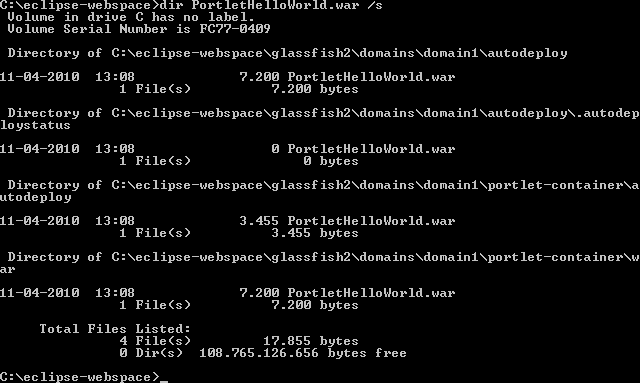
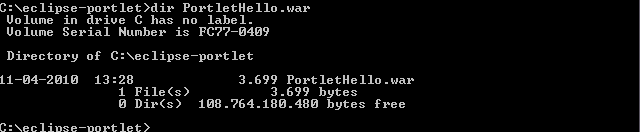
Notice that deployement has been done to
c:\eclipse-webspace\glassfish2\domains\domain1\portlet-container\autodeploy. The deployment is a war file of size 3455 bytes.
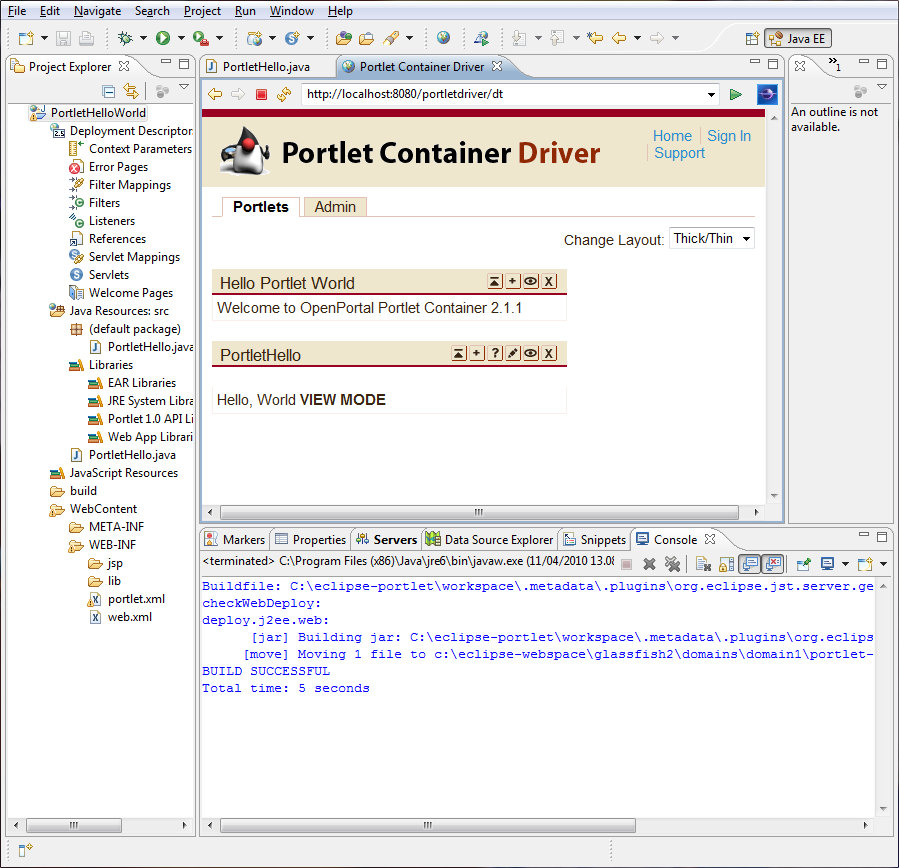
Eclipse test of Portlet
Proceed to the url http://localhost:8080/portletdriver/dt. Observe
the Portlet output message "Hello, World" which is the result of the two
added lines to the HelloPortlet.
This dialog allow displaying the 3 possible rendering modes of the portlet (as defined by the JSR-288 specification) :
- view - generates markup reflecting the current state of the portlet
- edit - allows a user to customize the behavior of the portlet
- help - provides information to the user as to how to use the portlet
Window states indicates of how much page space a portlet consumes on any given page.
This dialog also allow displaying the 3 possible window states of the portlet (as defined by the JSR-168 specification) :
- normal - a portlet shares this page with other portlets
- minimized -a portlet may show very little information, or none at all
- maximized - a portlet may be the only portlet displayed on this page
Undeployment of the Portlet is available from:
- command line :
cd <gf-install-dir>/domains/domain1/portlet-container/bin
ant undeploy-portlet -Dportlet-war=portlet-WAR-filename.war
- from the GUI using the "Admin" tab of the Portlet Container driver at
http://localhost:8080/portletdriver/admin

In fact multiple .war files have been created with different size 3455 and 7200 bytes.
The difference is whether (or not) the war file contains tag library definitions :
- WEB-INF/sun-portlet_2_0.tld
- WEB-INF/sun-portlet.tld
According to JSR 168: "The portlet-container must provide an implementation of the portlet tag library."
Actually inspecting the portlet container lib portlet-container.jar these files are indeed already in the
portlet container. Checking the PortletHelloWorld.war shows the files
included to be exactly the same as otherwise included in the portlet container lib .jar files. So including
the files is probably just an internal 'service' peformed by the portlet container.
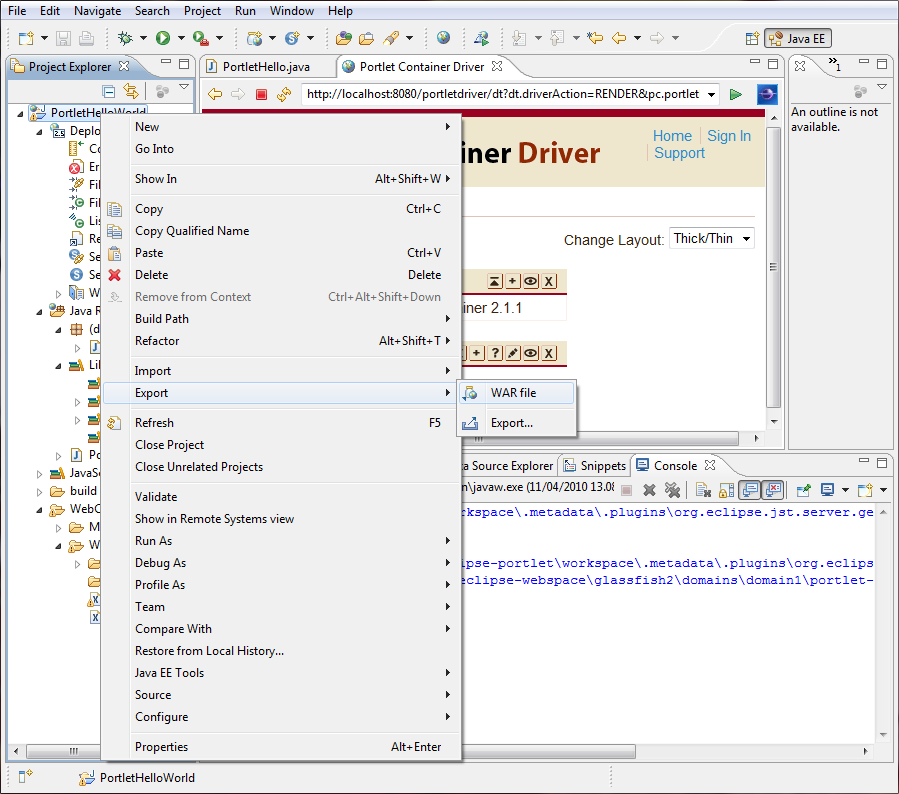
So bottom line is that the taglib definitions are unnecessary
when you do a normal export of the .war files as shown below:

This conludes the Portlet build and deployment session on Glassfish Web Space Server.
Ressources :